Articles
- Professional HDR Images
- Lomo Photography
- Color Correction
- Advanced Photo Sharpening
- Controlled Image Sharpening
- Dynamic Lighting
- Vanishing Point Filter
- Stitch-Photos
- Facial Retouching
- Photorealistic Coloring
- Removing Objects From Photos
- Black and White
- Change Hair Color
- Advanced Skin Softening
- Red Eye Tool
- Whitening Teeth & Eyes
- Age Progression
- Paint Lip Gloss
- Contrast Layers
- Illustration Vector Effect
- Using Ink Drops
- Light effects
- Colorful Picture Style
- Vector Portraits
- Vector Composite Effect
- Star Diffusion
- Photo Restoration
- Black and white portrait
- Selecting and extracting hair
Videos
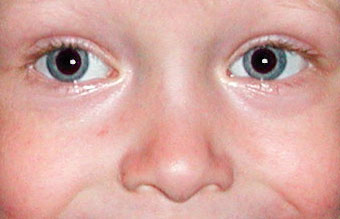
Using The Red Eye Tool Non-Destructively
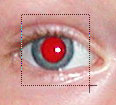
1. Basic red eye removal |

Save this image to your computer's hard drive by right clicking on it in your browser and selecting Save picture as...
Open this picture in Photoshop.
Duplicate the Background layer by dragging/dropping its thumbnail onto the Create a new layer icon ![]() :
:
Select the Red Eye tool ![]() in the tool bar:
in the tool bar:
With the tool selected use the following settings in the options bar:
Pupil Size: 50%
Darken Amount: 70%:
![]()
Make sure that the Background copy layer is the active layer (it will have a dark gray background in the layers palette):

Now remove the red in each eye by making a rough selection like this:
Note: sometimes the Red Eye Tool leaves some red behind. In that case just press Ctrl + Z ( Command + Z on the Mac) and try again:

2. Put red eye correction on a separate layer |
In order to turn it into a non-destructive edit we need to separate the actual correction.
First we need to change the layer's blending mode; make sure that the Background copy layer is the active layer (it will have a dark gray background in your layers palette)...

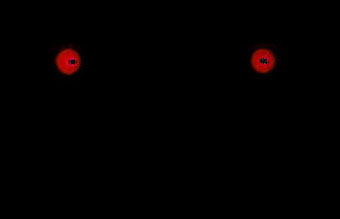
... and set the layer's blending mode to Difference:

Your document window will now show the difference between the two images:
To be able to get a separate layer for what we actually see in our document window (result of two blended layers), we need to merge all visible layer on a separate layer by pressing Ctrl + Alt + Shift + E (command + Option + Shift + E on the Mac):
Memorize this shortcut. It's a lot of keys you need to press, but it a very useful shortcut that you will use more and more over time.
We can now remove the Background copy layer by dragging/dropping it onto the Delete layer icon ![]() :
:
Continue by renaming Layer 1 to Red Eyes by double clicking on its name:
Our document window will now still show the black background with the two red eyes because we haven't set the proper blending mode yet, so set the blending mode of the Red Eyes layer to Difference:
Your document should now show the image with the corrected red eyes:
As a final step you can consider to right click (Control + click on the Mac) on the eye icon ![]() in front of the Red Eyes layer and to select Red as the color to mark this layer:
in front of the Red Eyes layer and to select Red as the color to mark this layer:
Color coding layers can be useful during photo retouching, because especially with non-destructive editing you quite often end up with lots of layers layers and without proper names or color coding you can easily lose track.
Source: http://www.lunacore.com/photoshop/tutorials/tut030.htm